In today’s digital age, photos hold a special place in our lives. We capture precious memories, document important moments, and express our creativity through photography. However, accidents can happen, whether it’s a device malfunction, accidental deletion, or loss of your iPhone. That’s why it’s crucial to back up your photos to ensure their safety and preservation. In this article, we will explore various methods to back up photos on your iPhone, including iCloud, Google Cloud, social media sharing, and the reliable Tiger Data Backup.

Part 1: Backing Up Photos via iCloud
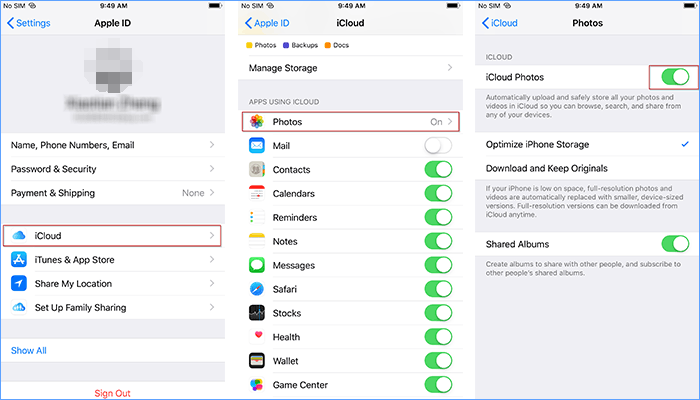
iCloud is Apple’s cloud storage service that enables seamless backup and synchronization of your iPhone data, including photos. To back up photos via iCloud, follow these steps:
- Connect your iPhone to a stable Wi-Fi network.
- Go to “Settings” on your iPhone and tap on your name at the top.
- Select “iCloud” and then “Photos.”
- Toggle on the “iCloud Photos” option.
- Choose “Optimize iPhone Storage” or “Download and Keep Originals” based on your preference.
- Your photos will now be automatically backed up to iCloud whenever your device is connected to Wi-Fi and charging.
Tip: The photos uploaded to iCloud can not be exported to computer in batch (only support one by one download), our software supports batch downloading.
Part 2: Backing Up Photos via Google Cloud
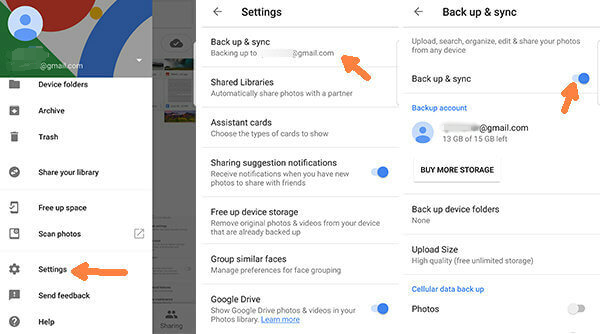
If you prefer using Google services, you can back up your iPhone photos to Google Cloud. Here’s how:
- Download and install the Google Photos app from the App Store.
- Launch the app and sign in with your Google account.
- Tap on the menu icon and go to “Settings.”
- Select “Backup & sync” and toggle on the feature.
- Choose the upload quality for your photos (High quality or Original quality).
- Your iPhone photos will now be backed up to Google Cloud whenever the app is open and connected to the internet.
Part 3: Backing Up Photos through Social Media Sharing
Social media platforms offer another avenue for backing up your iPhone photos by sharing them with friends and family. Follow these steps:
- Open the social media app of your choice (e.g., Facebook, Instagram, or Twitter).
- Create a private album or share the photos with a limited audience.
- Upload the desired photos to the album or your feed.
- Adjust privacy settings to ensure that only intended viewers can access the photos.
- You can now rely on the social media platform to store and preserve your photos.

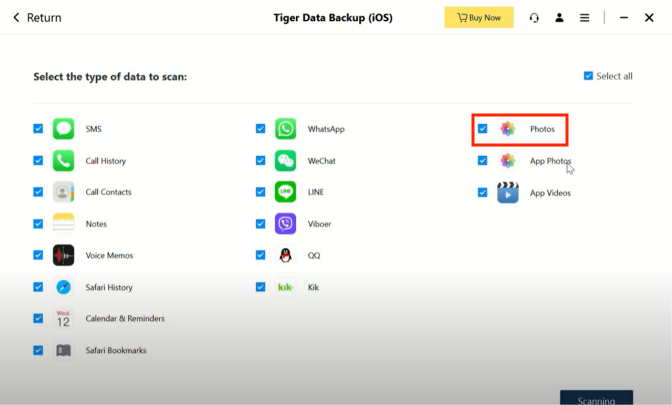
Part 4: Backing Up Photos via Tiger Data Backup
Tiger Data Backup provides a reliable solution for backing up your iPhone photos. Here’s how you can use it:
- Download and install Tiger Data Backup(use app for the payment and activation).
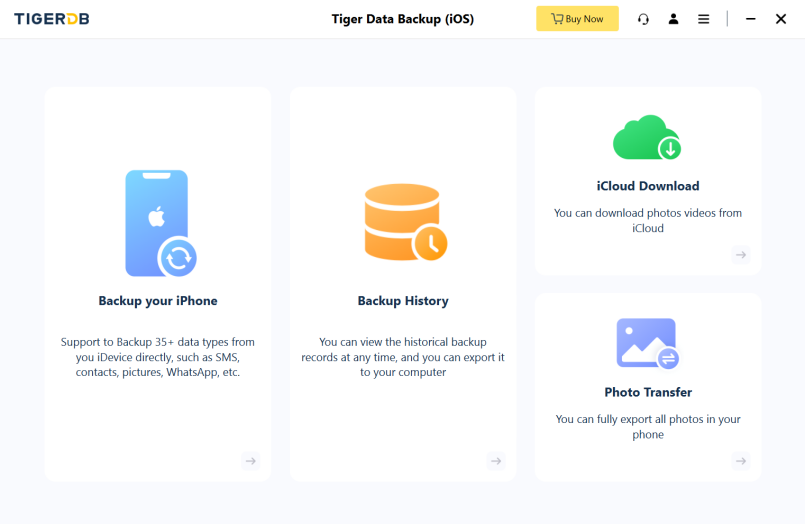
- Launch the app and follow the on-screen instructions to set up an account.
- Connect your iPhone to your computer using a USB cable.
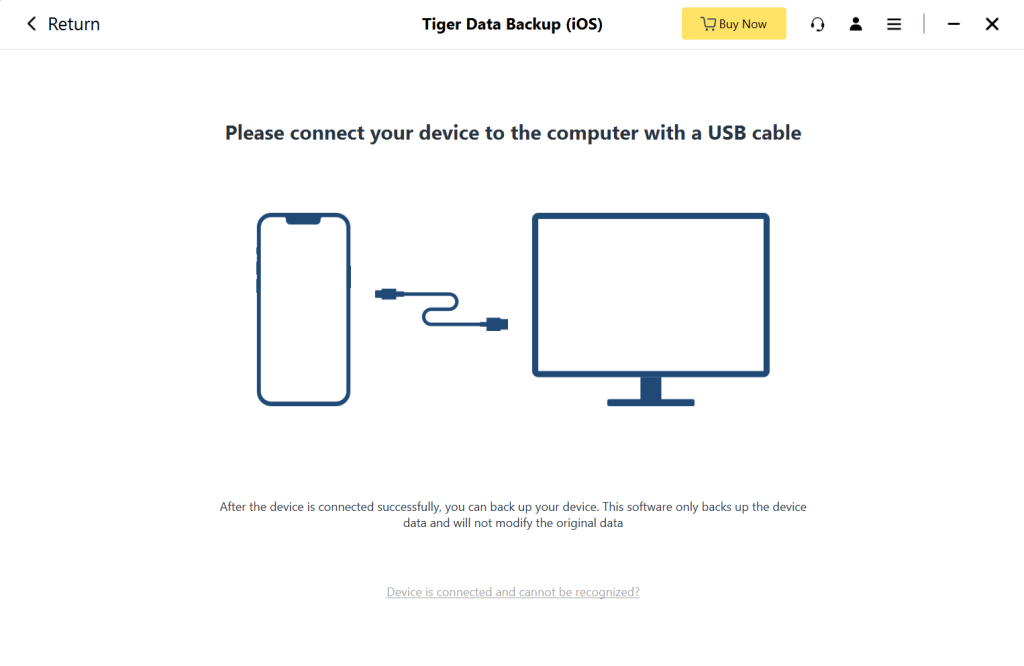
- Open the Tiger Data Backup software on your computer.
- Select the “Photos” option and choose the photos you want to back up.
- Click on the “Backup” button to start the backup process.
- Your iPhone photos will now be securely backed up to your computer using Tiger Data Backup.
Here’s the video tutorial, click for details.
Conclusion
Backing up your iPhone photos is essential to protect your precious memories. While there are various methods available, each with its own advantages, Tiger Data Backup stands out as a reliable choice. Remember, no matter which method you choose, regular backups are key to keeping your memories safe and accessible for years to come.